The menu of a website offers the necessary understanding so that your visitors enjoy an easy browsing experience on your website.
That’s why, in this guide, we will show you how to manage and customize the whole menu of your website.
Let’s go! 💪
Go to the Content panel, in the section called Insert content, to find the Menu block.
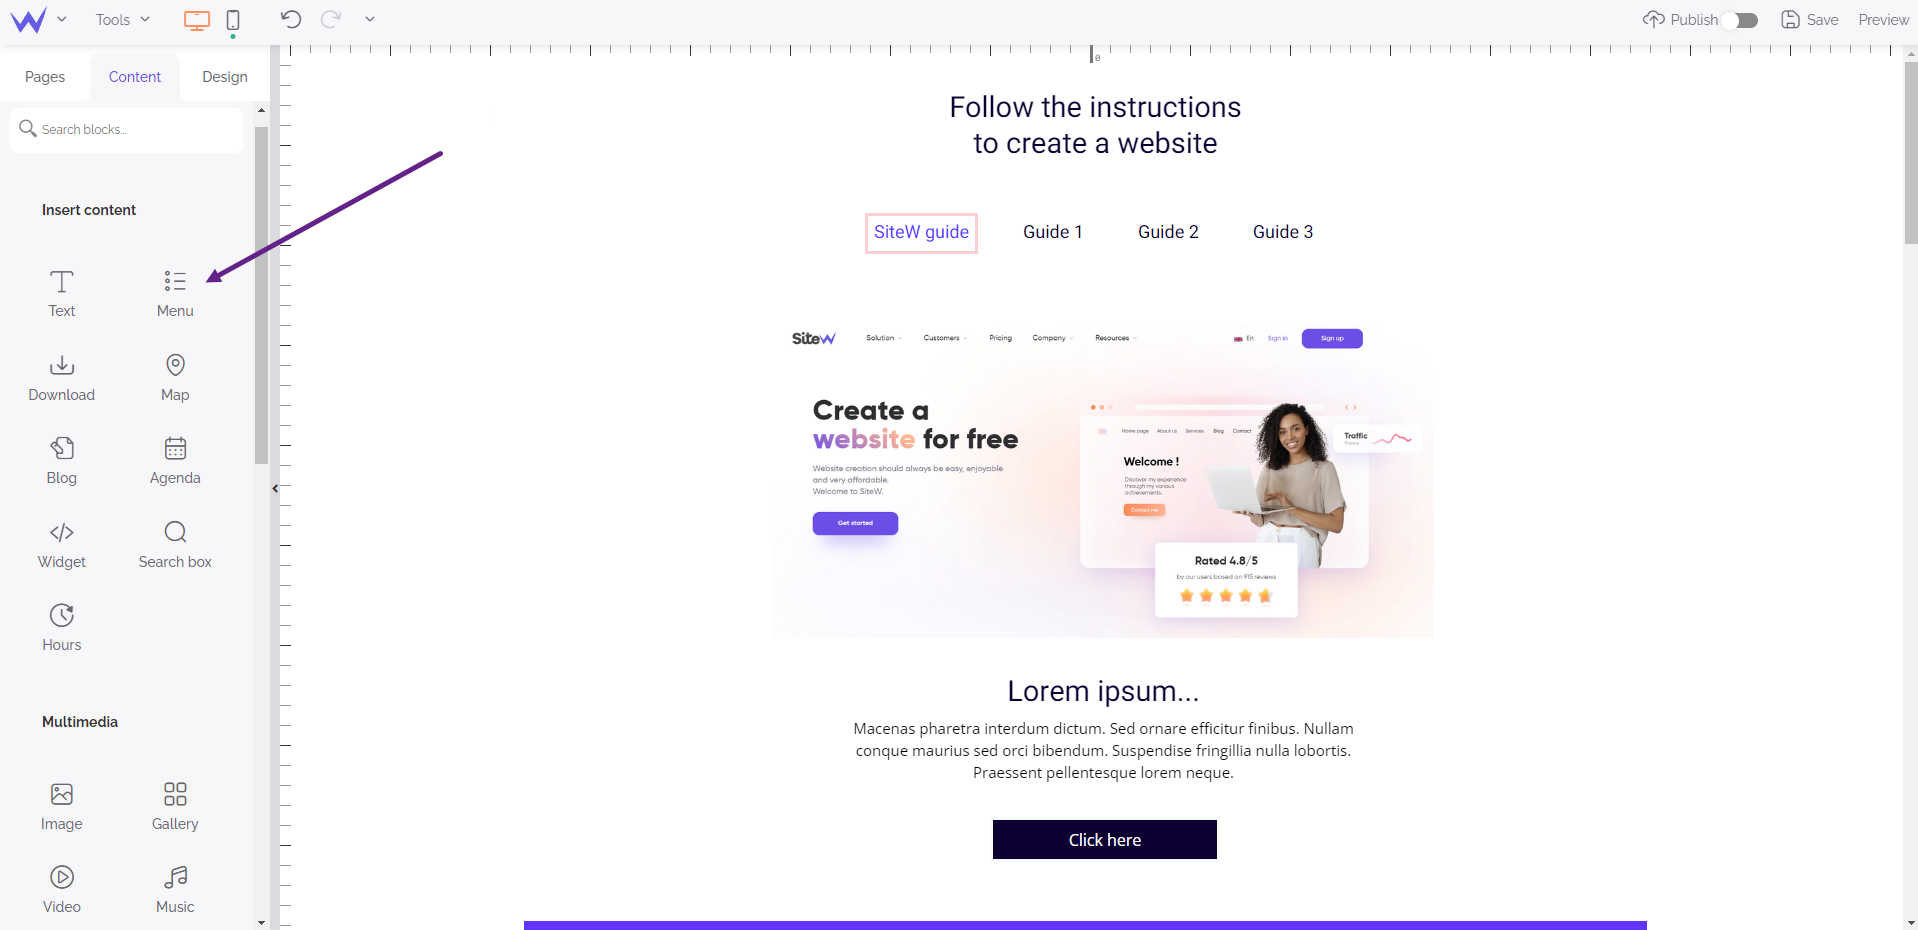
This block enables you to create a menu that will list your pages. You can choose the pages you will display on your menu, as well as on which pages your menu must be displayed. You have two styles of menus: Horizontal (menu on the top of your website), and Vertical (menu on the left or the right of your website).
By clicking your menu, you can:
Important information
When you add a page to your website, the page is automatically added to your menu.
Your subpages can be displayed in your menu. For example, if you sell shoes on your online store, you probably need a menu called Shoes, as well as subpages called Sneakers, boots, sandals. We will talk about it later.
If you click Manage pages, you’ll access a panel that displays a pop-up to configure your menu and its pages.
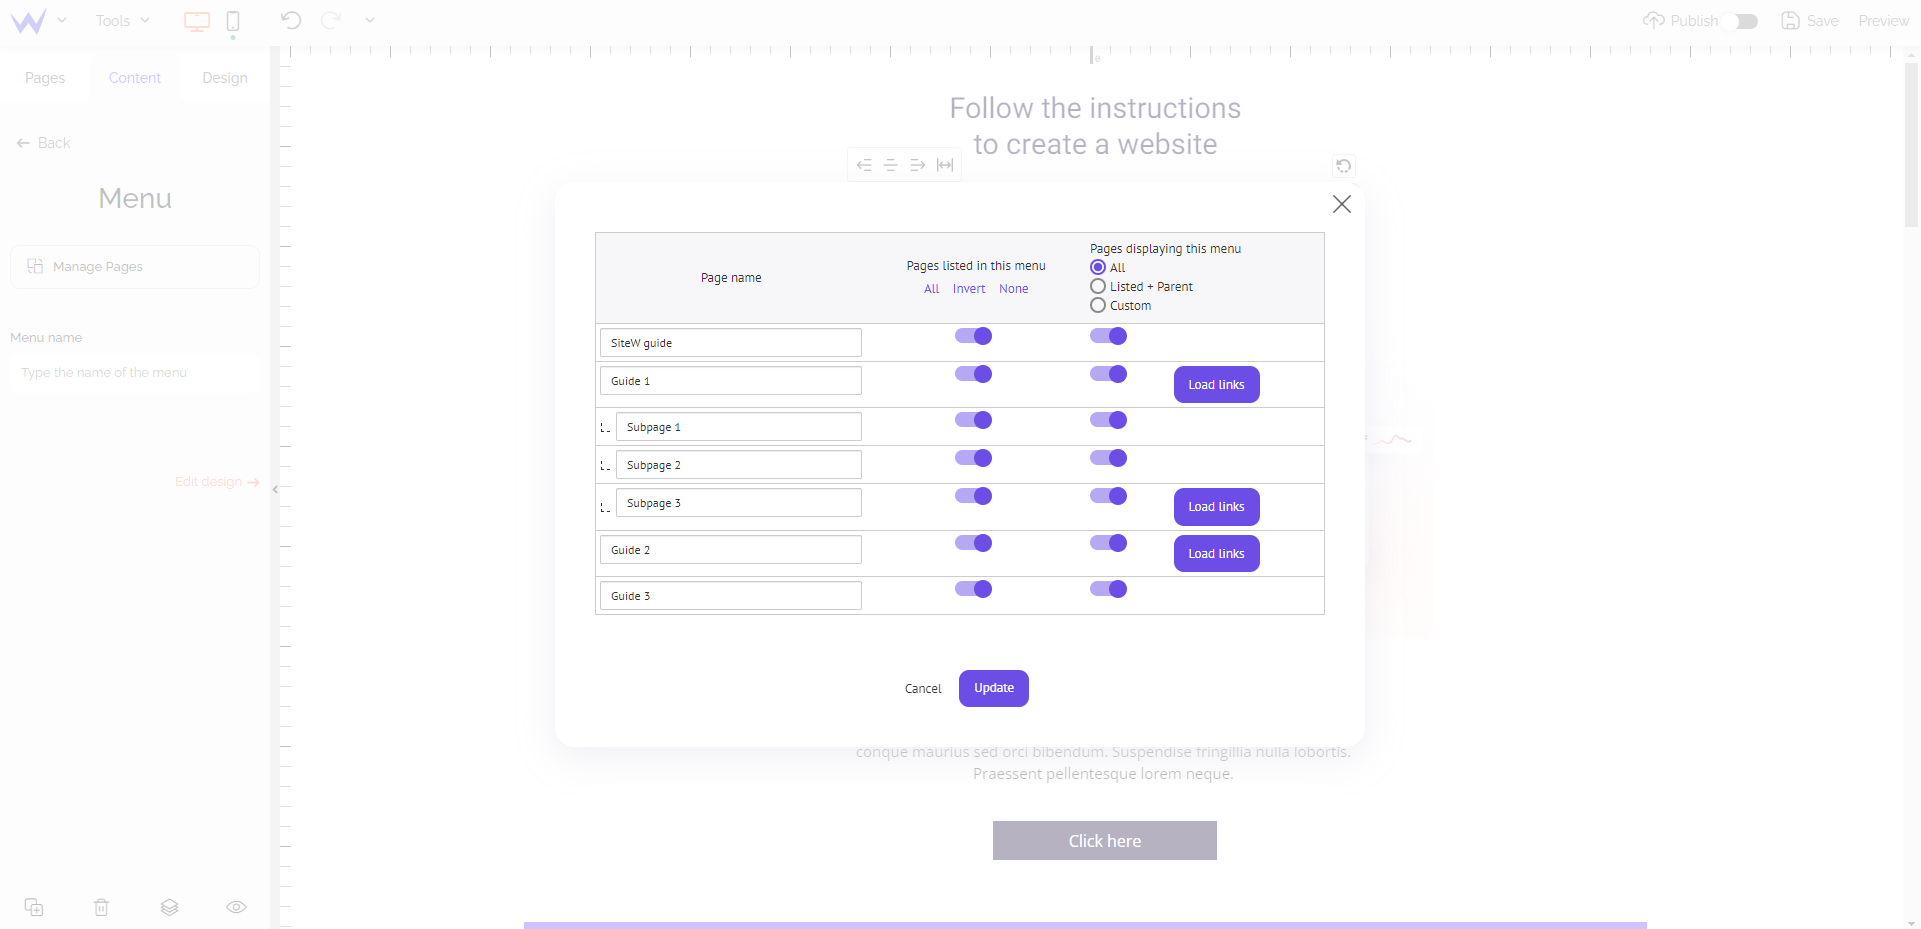
In front of each page name, you can tick these boxes:
-
Pages listed in this menu (All, Invert, None): you can choose if you display the page in your menu
-
Pages displaying this menu (All, Listed + Parent, Custom): you can choose the pages that will display your menu
If you don’t want your visitors to click on the pages with submenus, tick this box: No link for main pages with submenu.
Watch out
If you have a Starter package, you can create up to 5 pages. Upgrade if you want to enjoy unlimited pages.
Now, let’s see how to create dropdown menus?
When you have many subpages, dropdown menus make your website dynamic and your visitors’ browsing easy.
It’s easy to create dropdown menus!
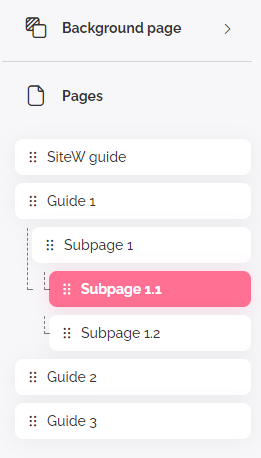
Go to Pages and select a page long enough, and move the selected page to the right.
Keep a certain hierarchy between your pages, such as on the following screenshot:
Depending on the position of your horizontal or vertical menu, the display of your submenus is different:
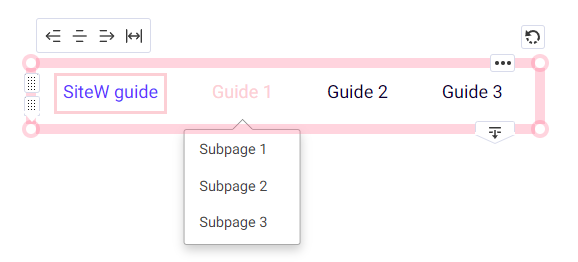
Horizontal menu
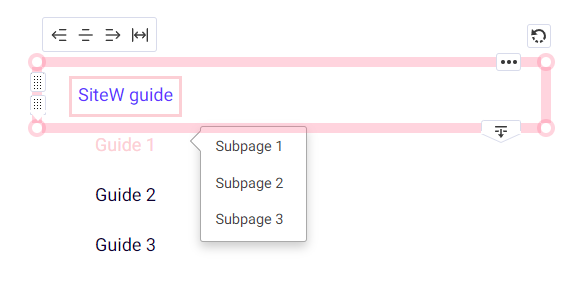
Vertical menu
It’s possible to move a block from one page to another easily and intuitively. You can manage a Store block, a Newsletter block, an Image block… by positioning your mouse over the block of your choice and then, right click to open a dropdown list.
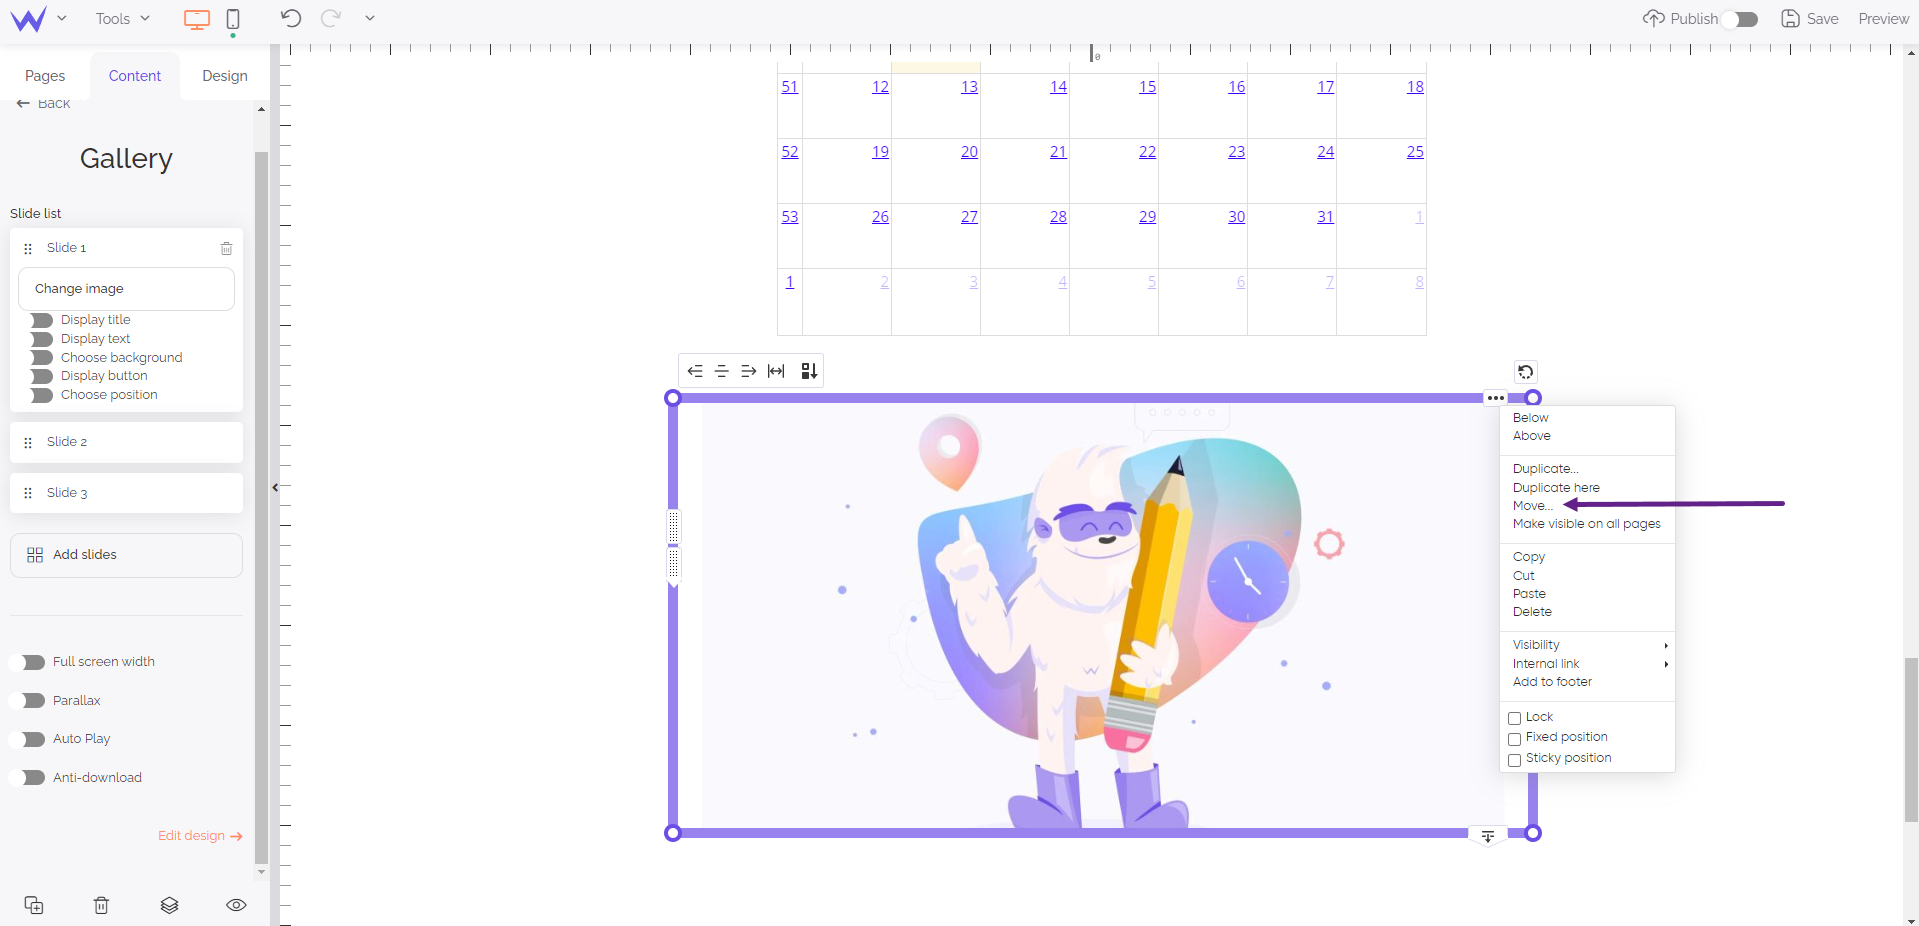
Click on Move. Then, in the management panel, you will see a destination page. You just have to select the page where you want to move your block.
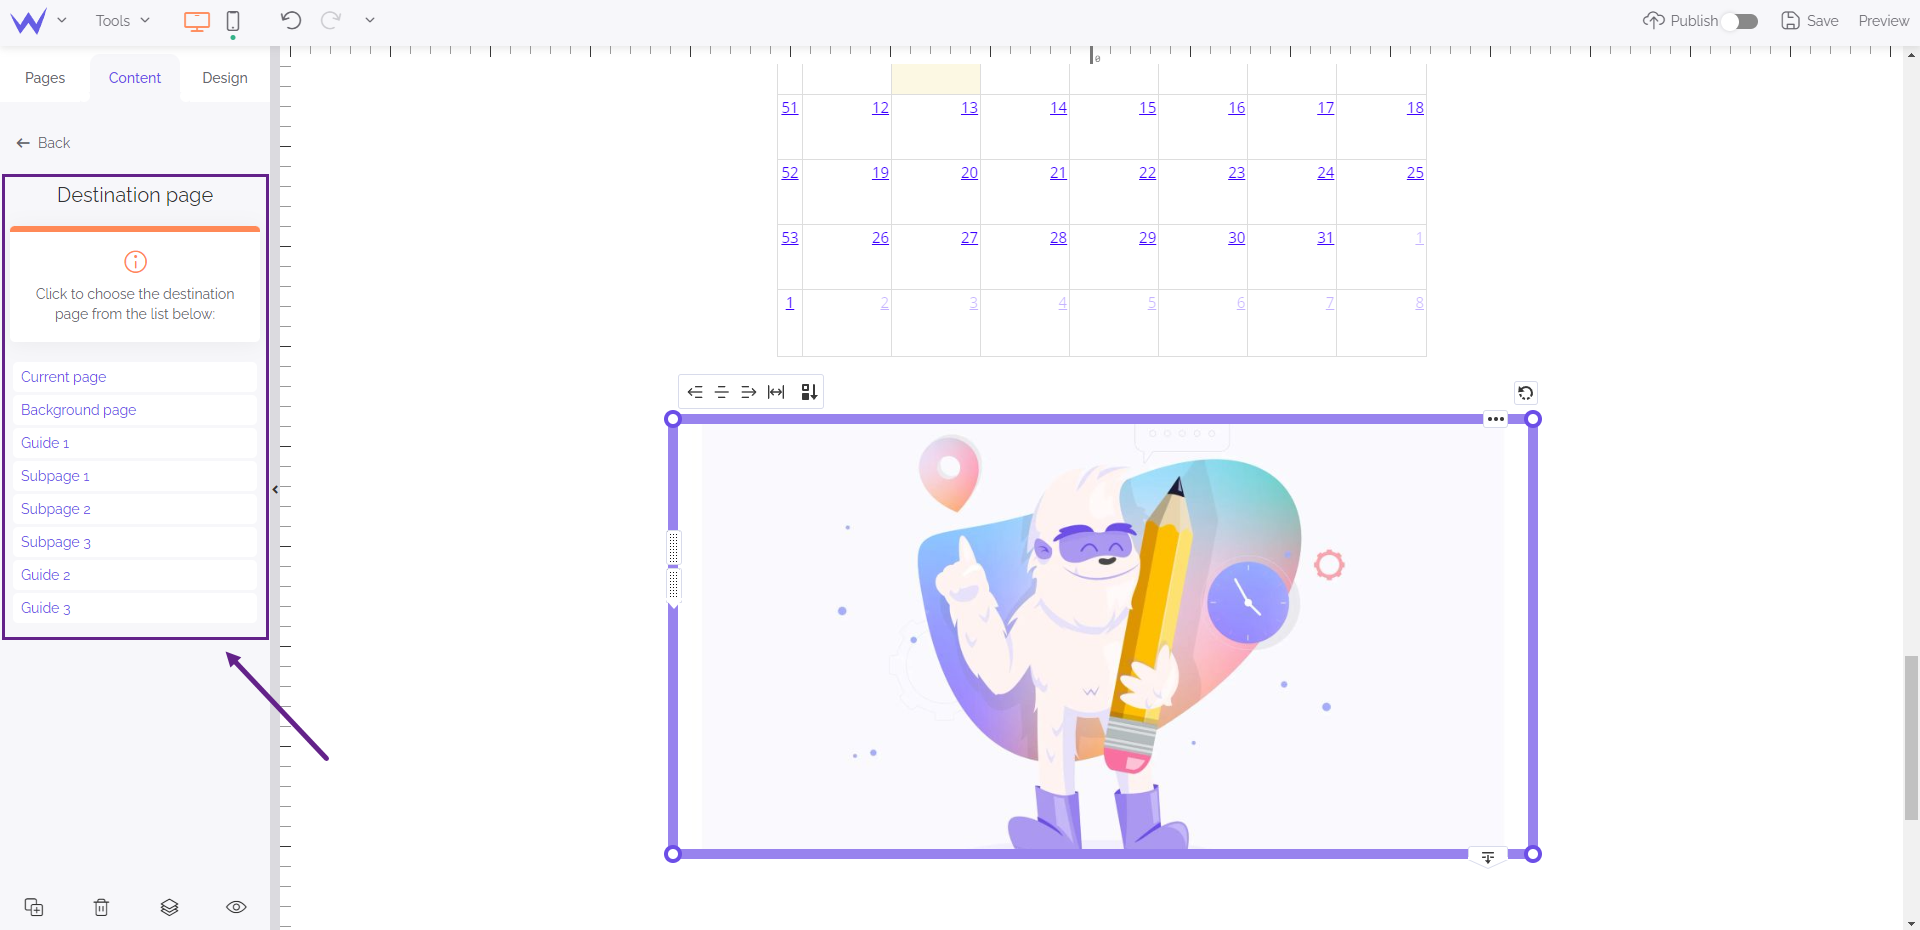
Then, you’ll find the block you have just moved on the page of your choice.
To start the customization of your menu, you just need to follow these steps:
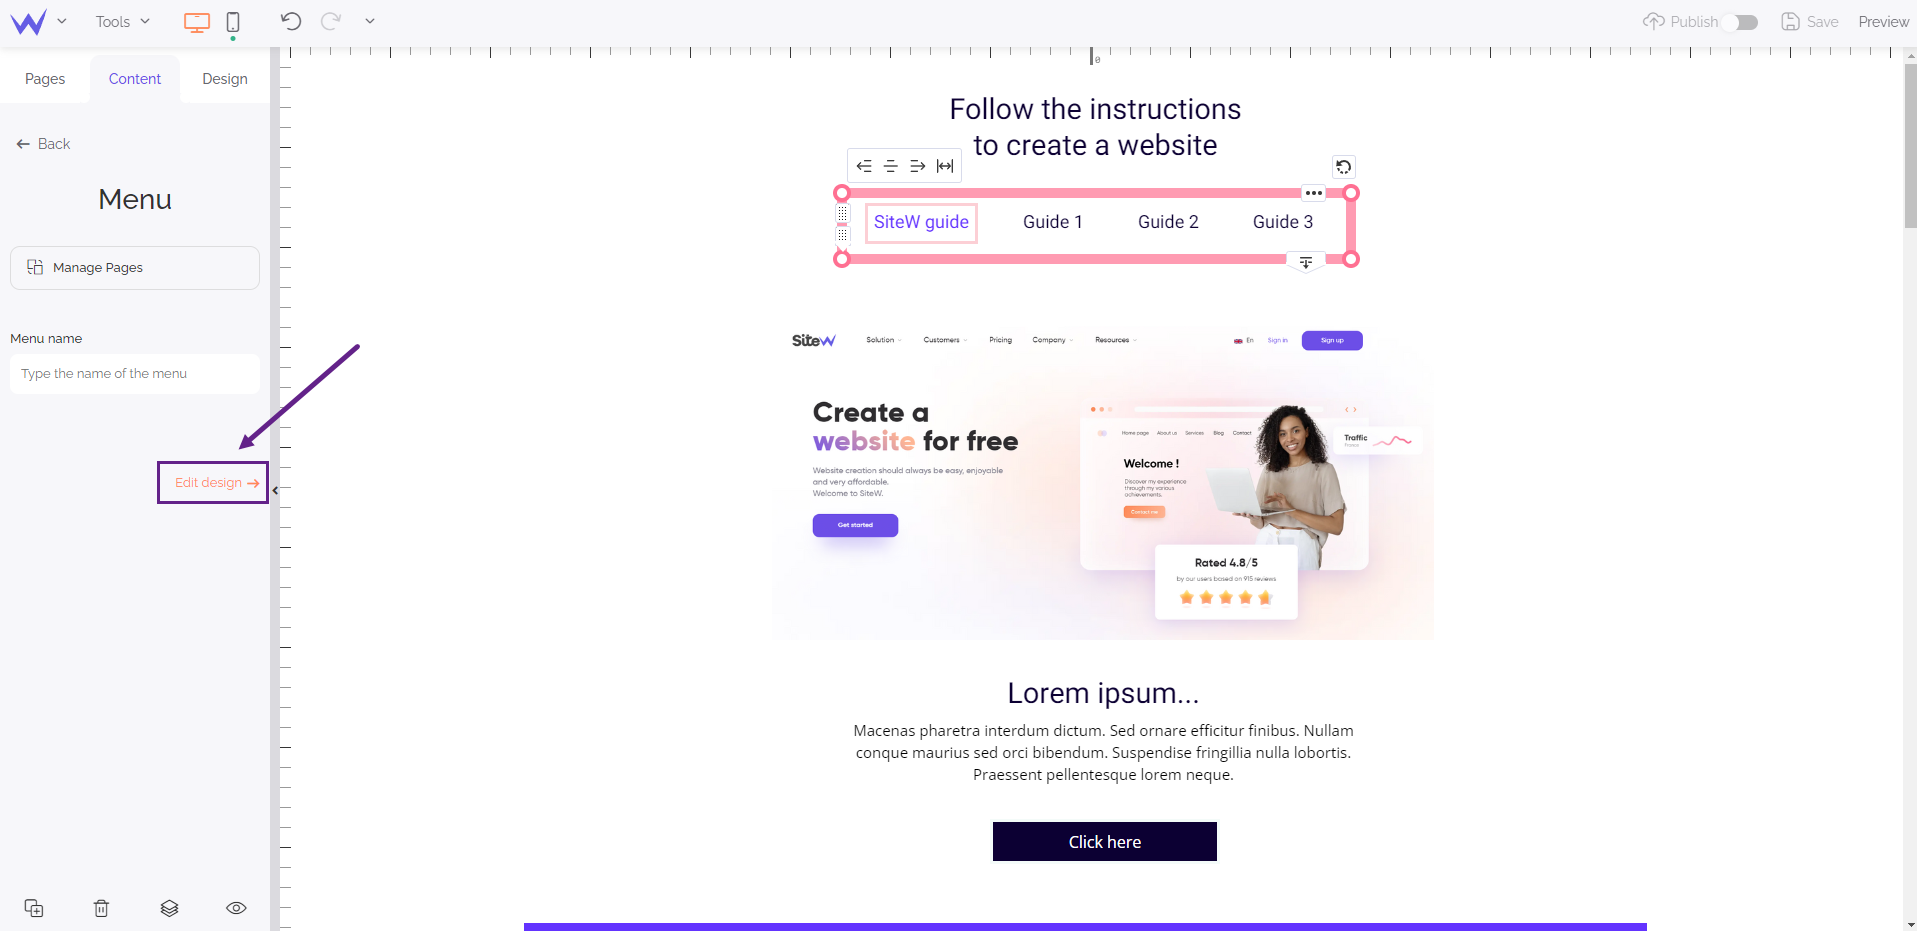
Thus, you can see the management panel to modify the design of your menu. 👇
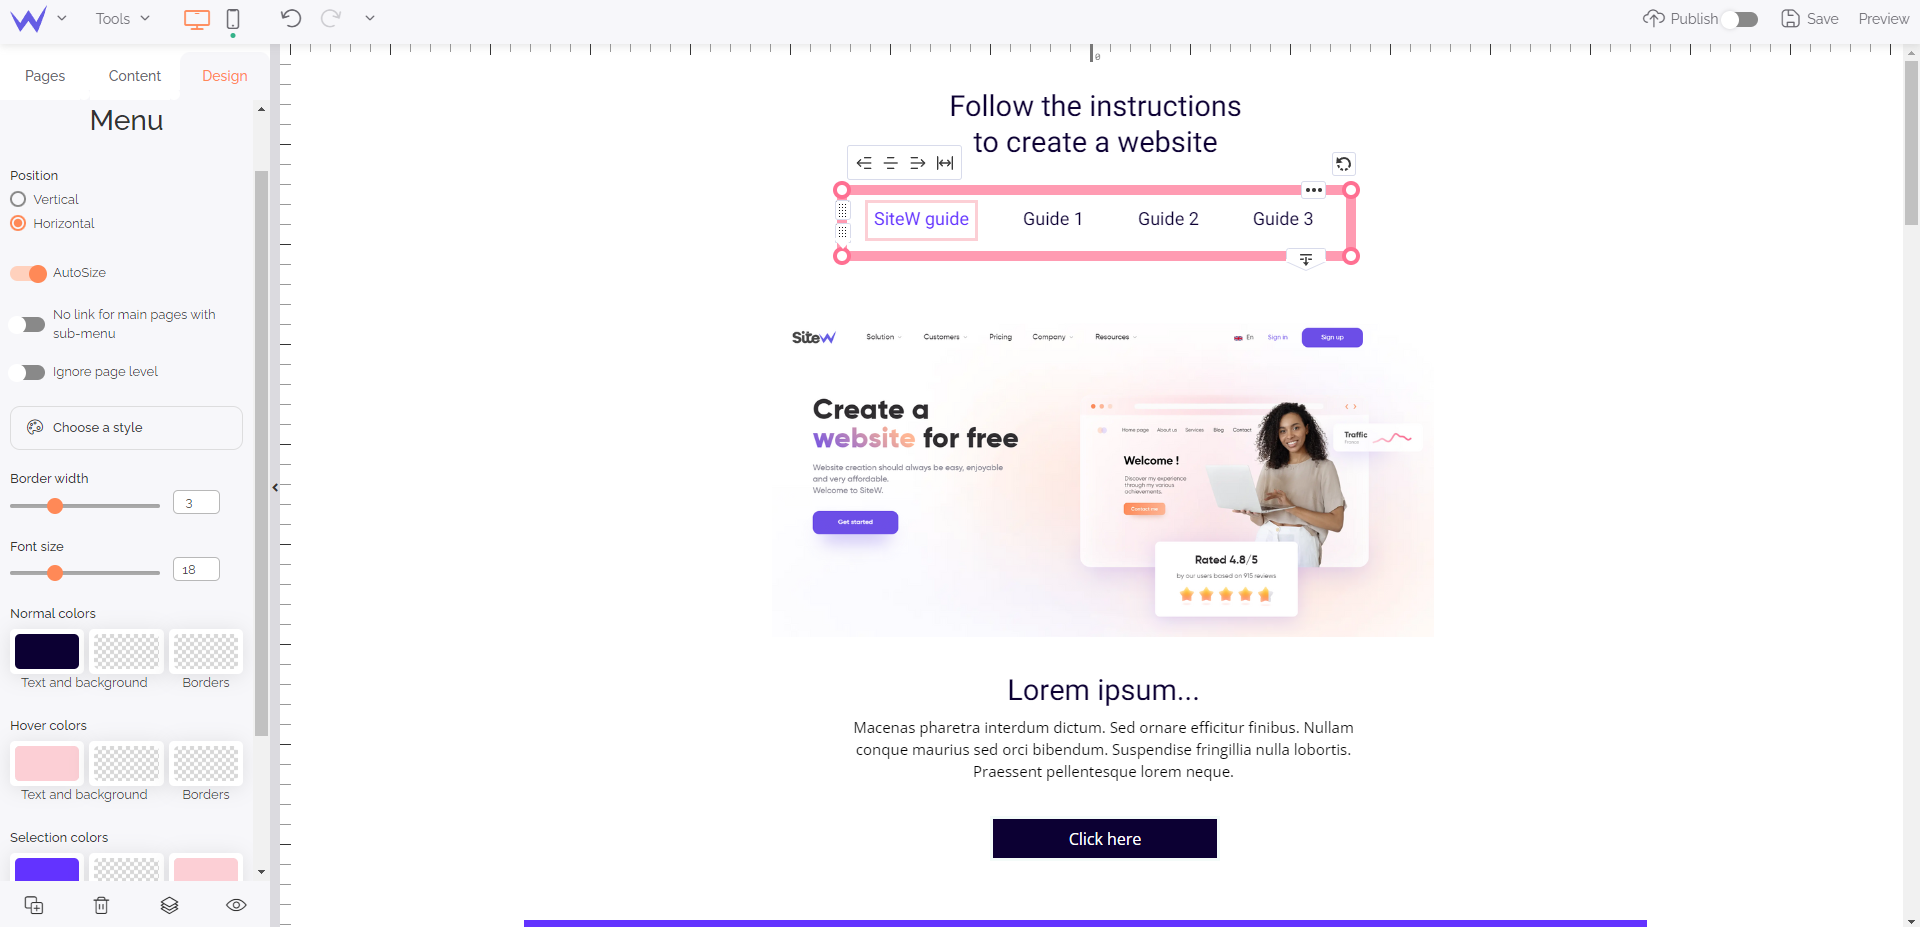
Here are the different modifiable settings:
-
Position. You have two options: Horizontal for a menu displayed horizontally, or Vertical for a menu displayed vertically.
-
Autosize. If you tick this box, the menu will adapt its size when new pages are added.
-
No link for main pages with submenu. By ticking this box, your visitors won’t be able to click on your main menu if you have submenus.
And then, to define the style of your menu, click Choose a style. You’ll access different styles. You’ll just need to click the style you like by ticking the box in front of each style.
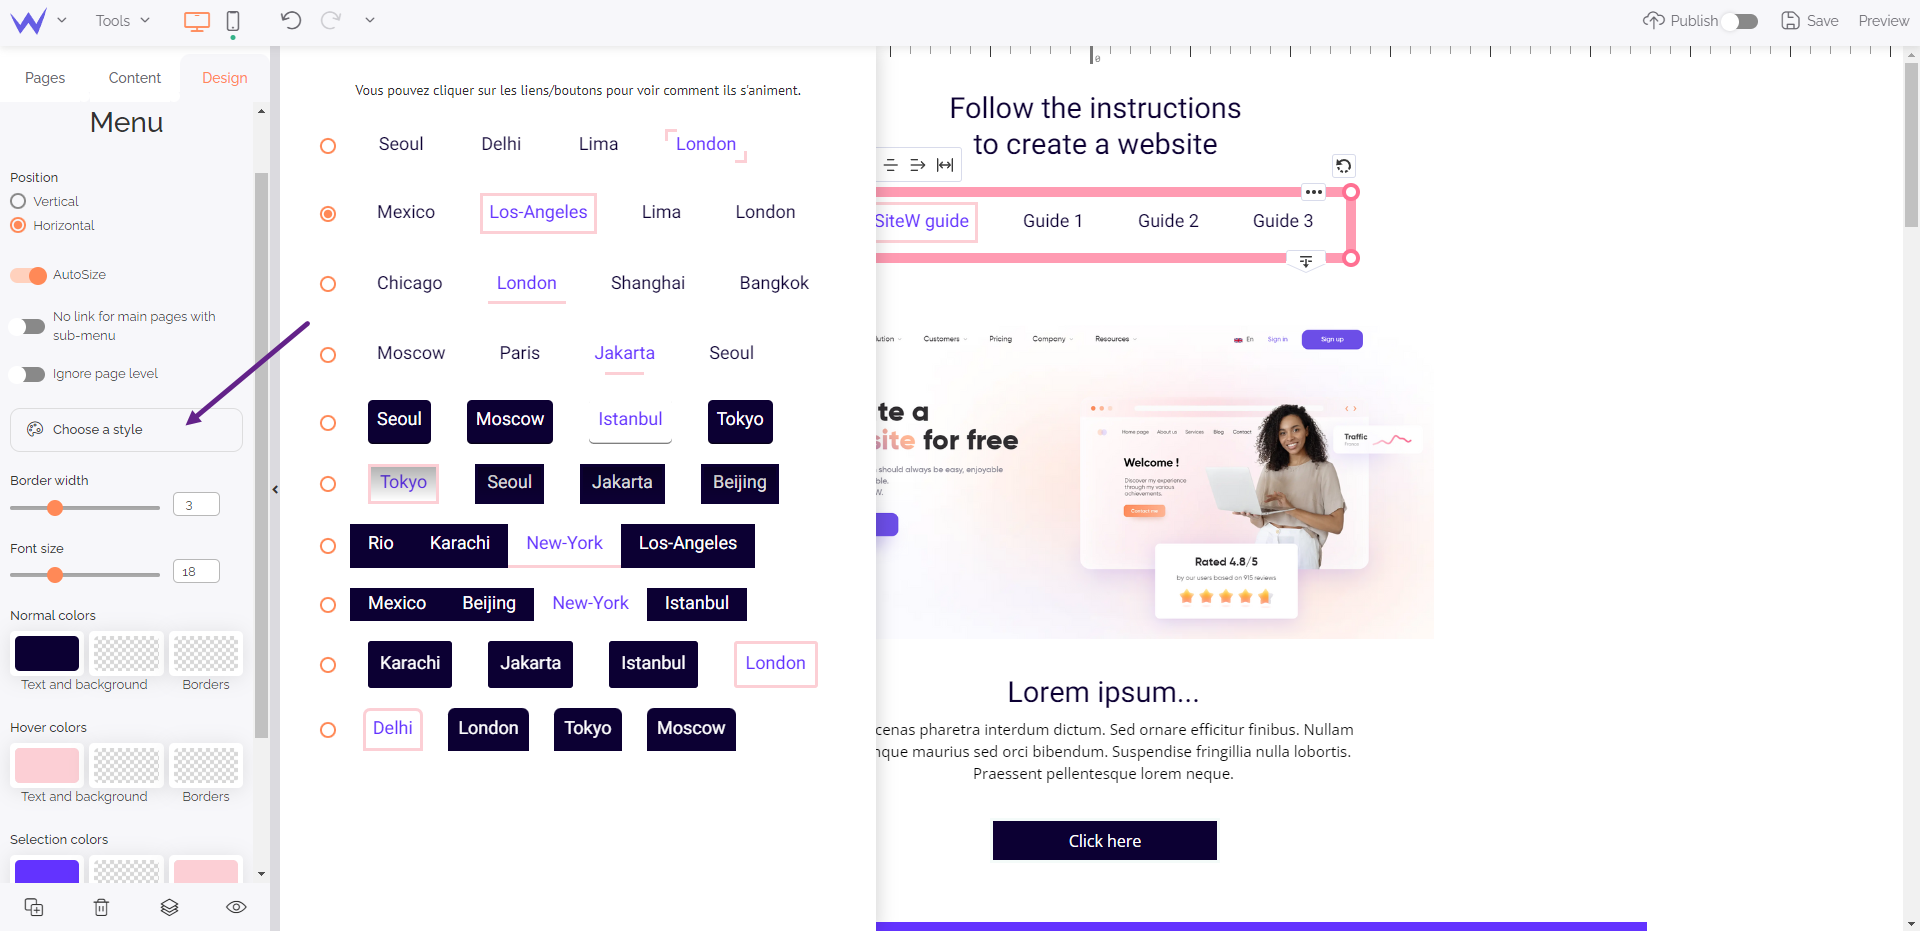
Once you have chosen the style of your menu, you can configure these settings:
-
Border width: define your menu’s border width
-
Font size: set your menu size by moving the cursor on the smaller ruler, or by entering a value in the input field directly
-
Colours: you can customize your colours for three options (normal, hover, selection). For each option, you can choose the colours for these elements: Text and background. Click on the option you want to customize and then, select a colour of your choice.


