General points
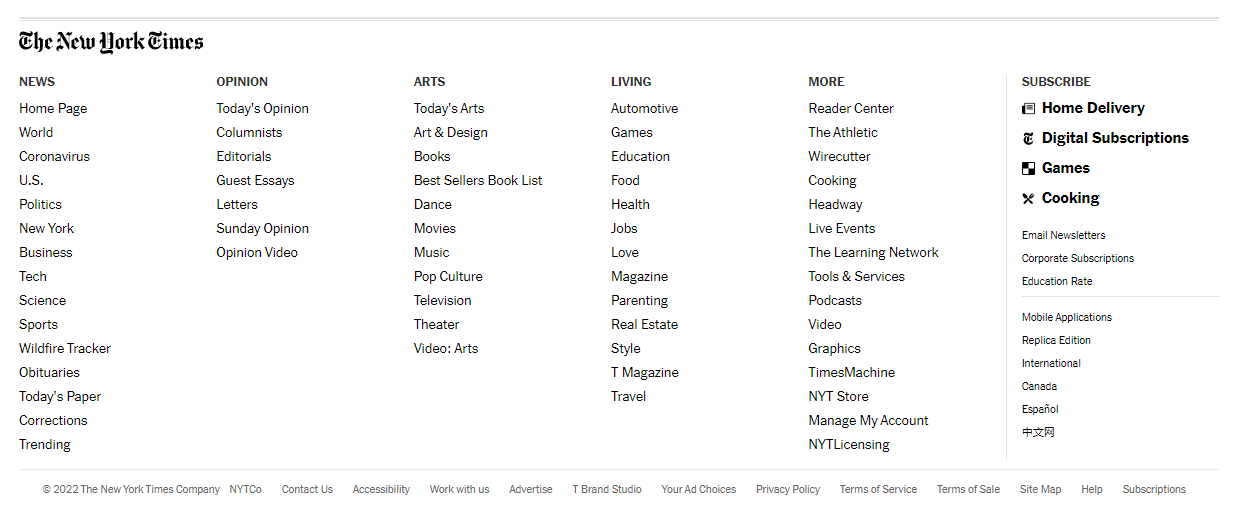
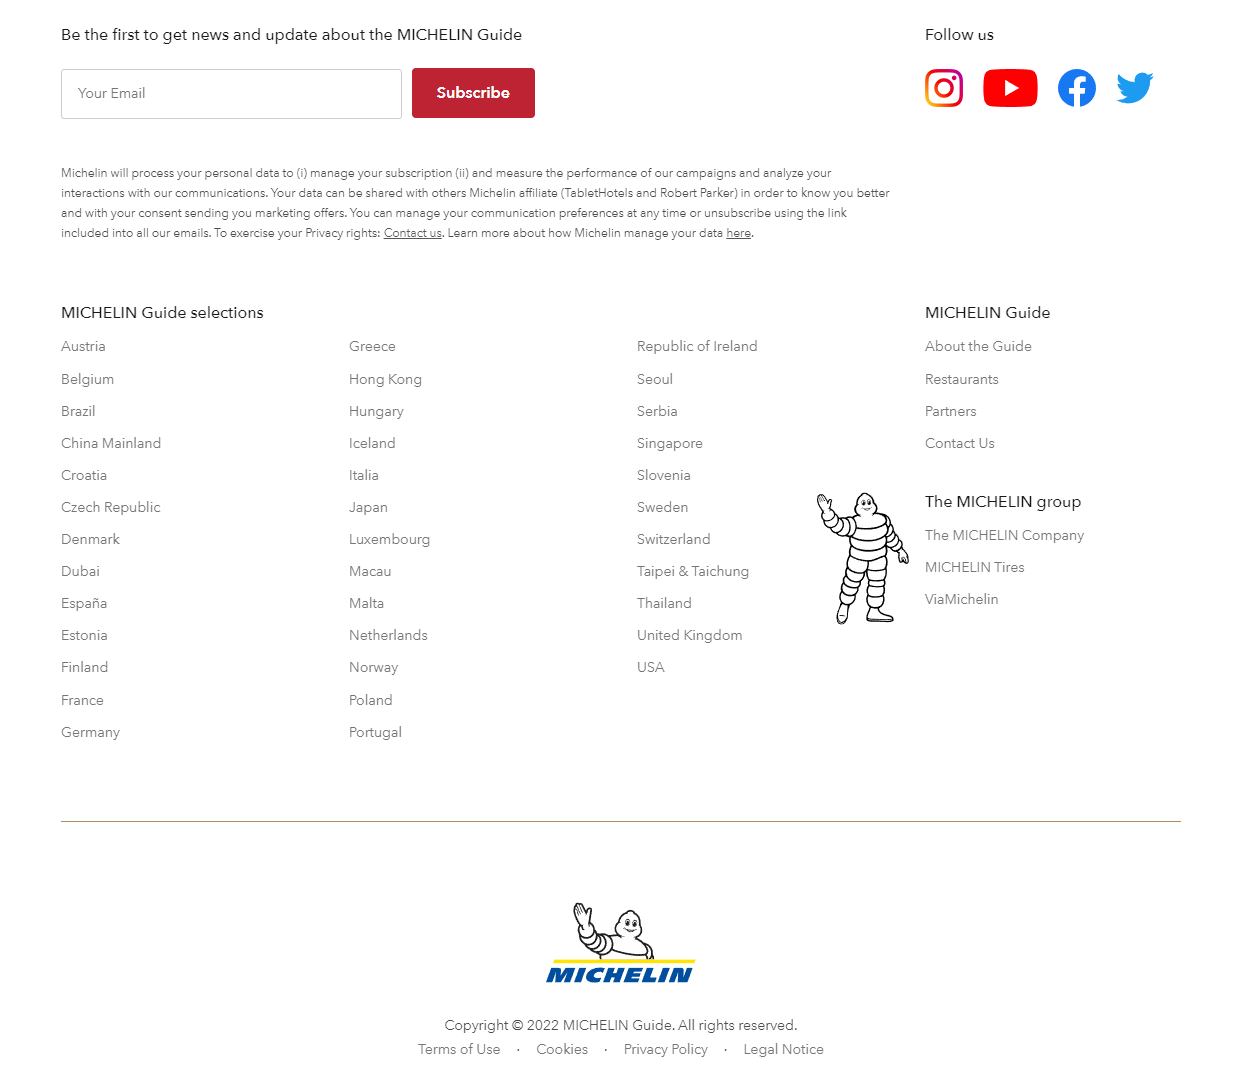
The footer is an area at the bottom of each page of your website, regardless of the height of the page. So, the blocks added to the footer will always be just below the last block on each of your pages.
Such as for the header, most websites have a footer because it is an area where visitors are used to quickly finding practical information. In general, this footer has a menu, contact information, links to social networks, sometimes a back to top button (or link), etc.
Compatibility
The footer is compatible with the Automatic and Manual mobile views.
It can have any block in it, except the following elements:
The height of the footer works in the same way as the height of your pages: the footer automatically widens if a block is moved down. Resizing or moving one or several blocks automatically changes the height of the footer if necessary.
Enable / Disable
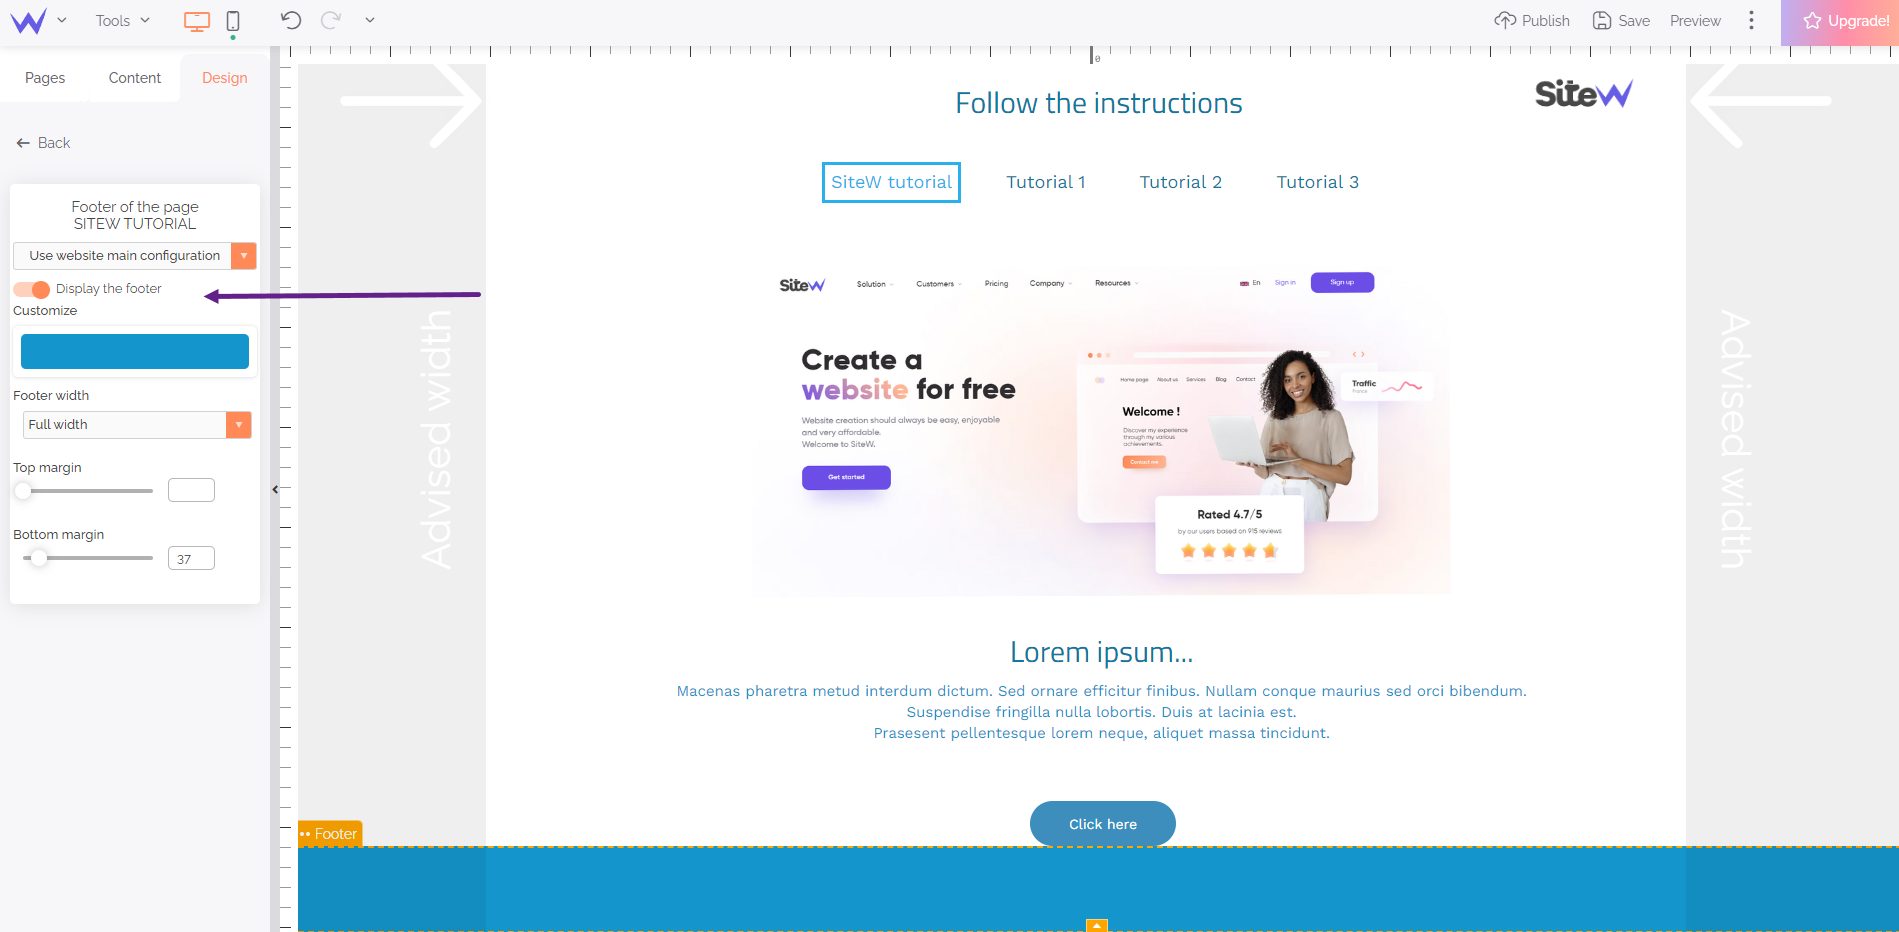
Obviously, a footer isn’t obligatory, and you have the possibility to disable it with a click for the entire website or just for a specific page. To that end, in the “Footer” section of the Design tab, you just need to deselect “Display the footer” after selecting “Use website main configuration” or “Customization of this page only”.
Configuration per page
The footer can be configured in two different ways:
All blocks in the footer will be displayed on all pages. The pages with a custom footer don’t display the blocks of the general footer (it’s either one or the other, but not both at the same time).
- Footer for a specific page
You may want a unique footer for some pages (for example, for the footer of a Legal notice page). So, you can configure the footer “for this page only”. In this case, only the blocks defined for this footer will be displayed on this page. Moreover, this unique footer will have its own configurations: the background, the width and the edges can be different from the general footer.
In order that you can easily identify which type of footer is it (general or specific), it is framed in orange when it is configured for the entire website and in blue when it just affects the current page.
Add blocks
There are 3 methods to add a block to your footer:
(new block): Drag and drop a new block directly in the footer area.
(existing block): Drag an existing block in the left bottom corner where a “Footer” semicircle is shown and then drop the block in this semicircle.
(existing block): Right-click on an existing block and choose “Add to footer”.
💡 Please note that when a block is at the bottom of the page, a small icon is shown (when the block is selected) and enables you to add this block to the footer.
In the same way, you can move a block from the footer to the body page by dragging and dropping it into your page (it will automatically be removed from the footer).
Special case of the Menu block
In the footer, such as on the rest of the website, the Menu block manages the pages where it is. So, the same Menu block can be in a general footer or in custom footers for a specific page (if that is its configuration).
Background and width
Background customization
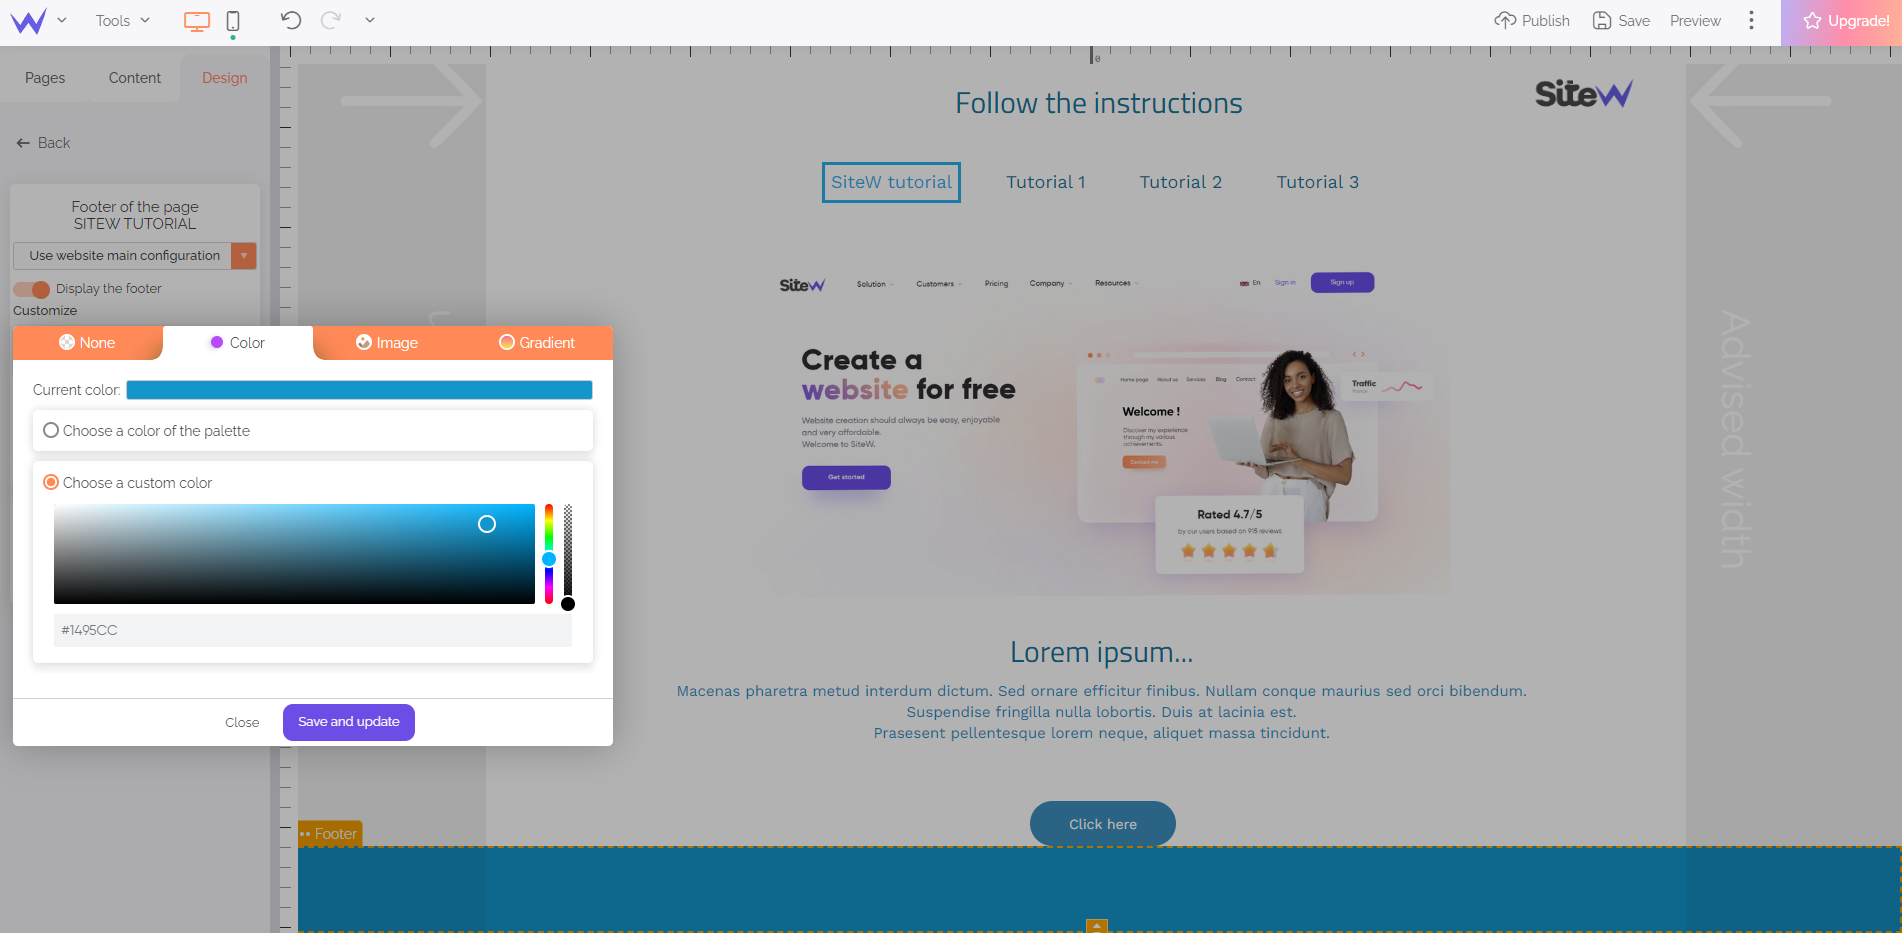
The footer area serves as a “container” that contains different elements (blocks). You can apply a background, the possibilities are:
- None: your footer is transparent
- Plain colour
- Gradient
-
Background image: the image can be fixed to give style
- Texture (repeatable image)
Width
The footer takes up the entire width of the website as it defaults. However, you can decide that the width of the footer matches the width of your content area.
Top and bottom margins
Top margin
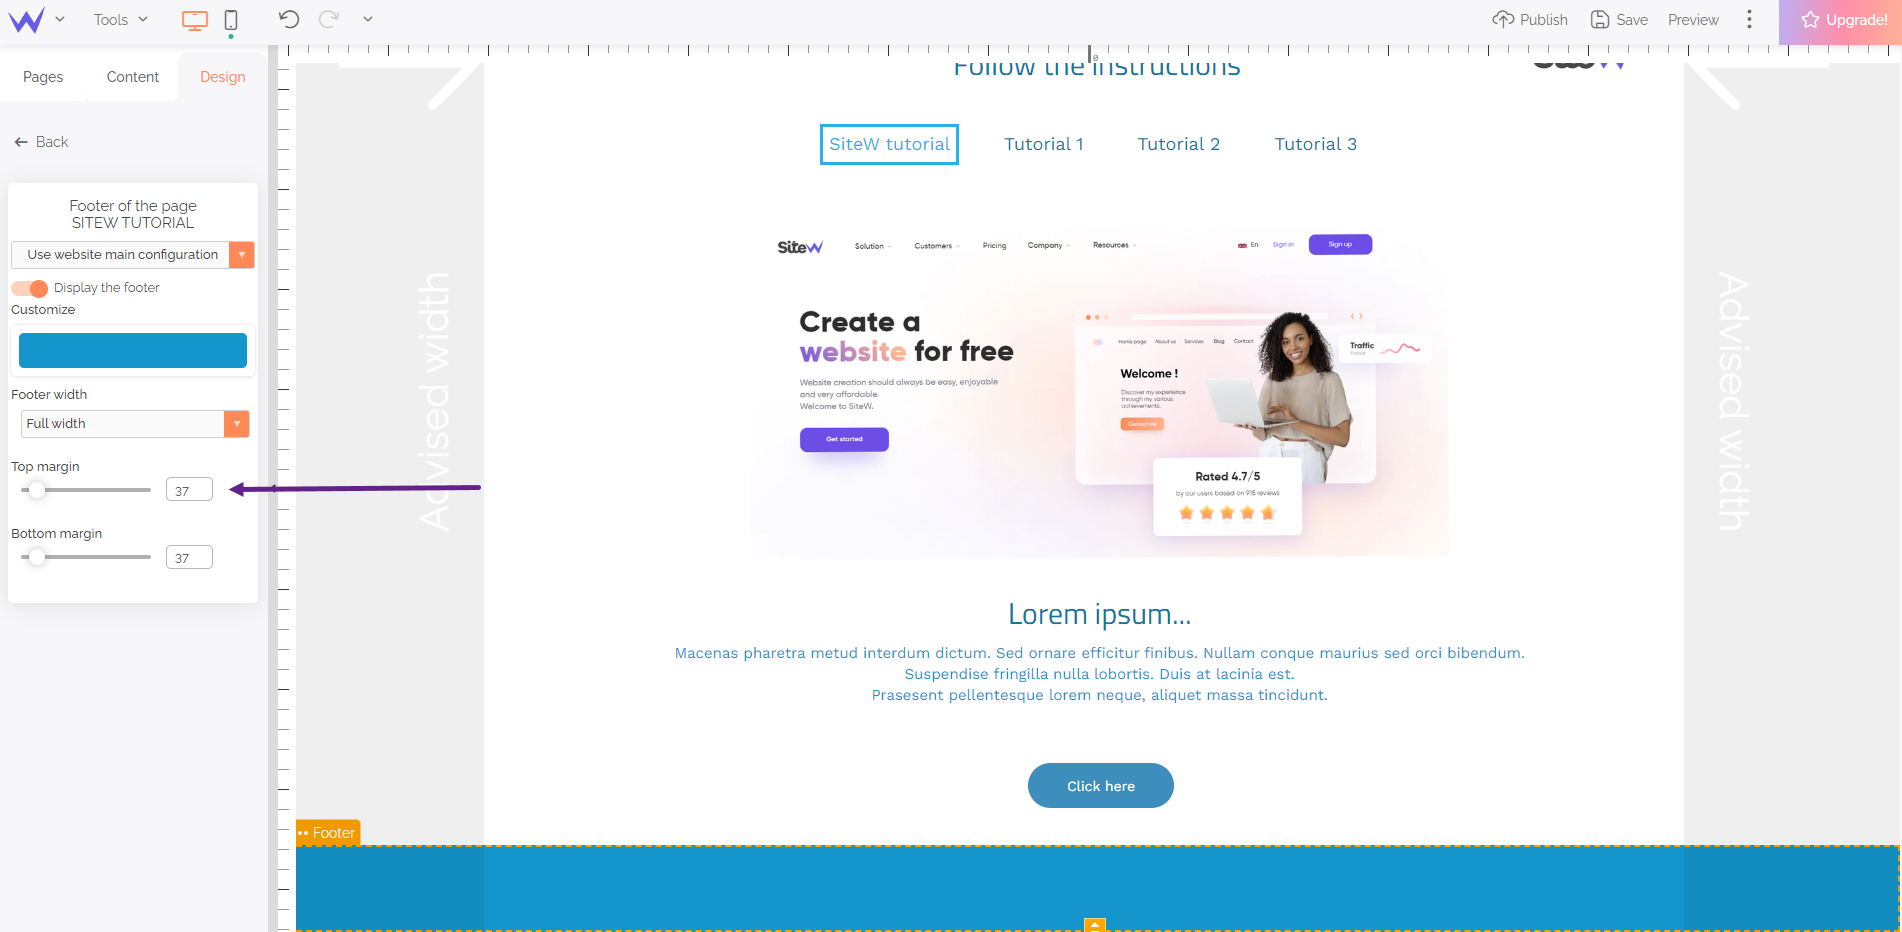
The top margin is the spacing between your footer and the bottom of the last block of the current page. Most of the time, you want to avoid the footer blocks being stuck to the page blocks. This is why you can define a margin that enables you to separate the footer from the content of your different pages. This margin is called “Top margin”. You can set this margin by using the handle provided for the purpose or the cursor in the “Footer” section of the Design panel. The maximal value of this margin is up to 300 pixels.
Bottom padding
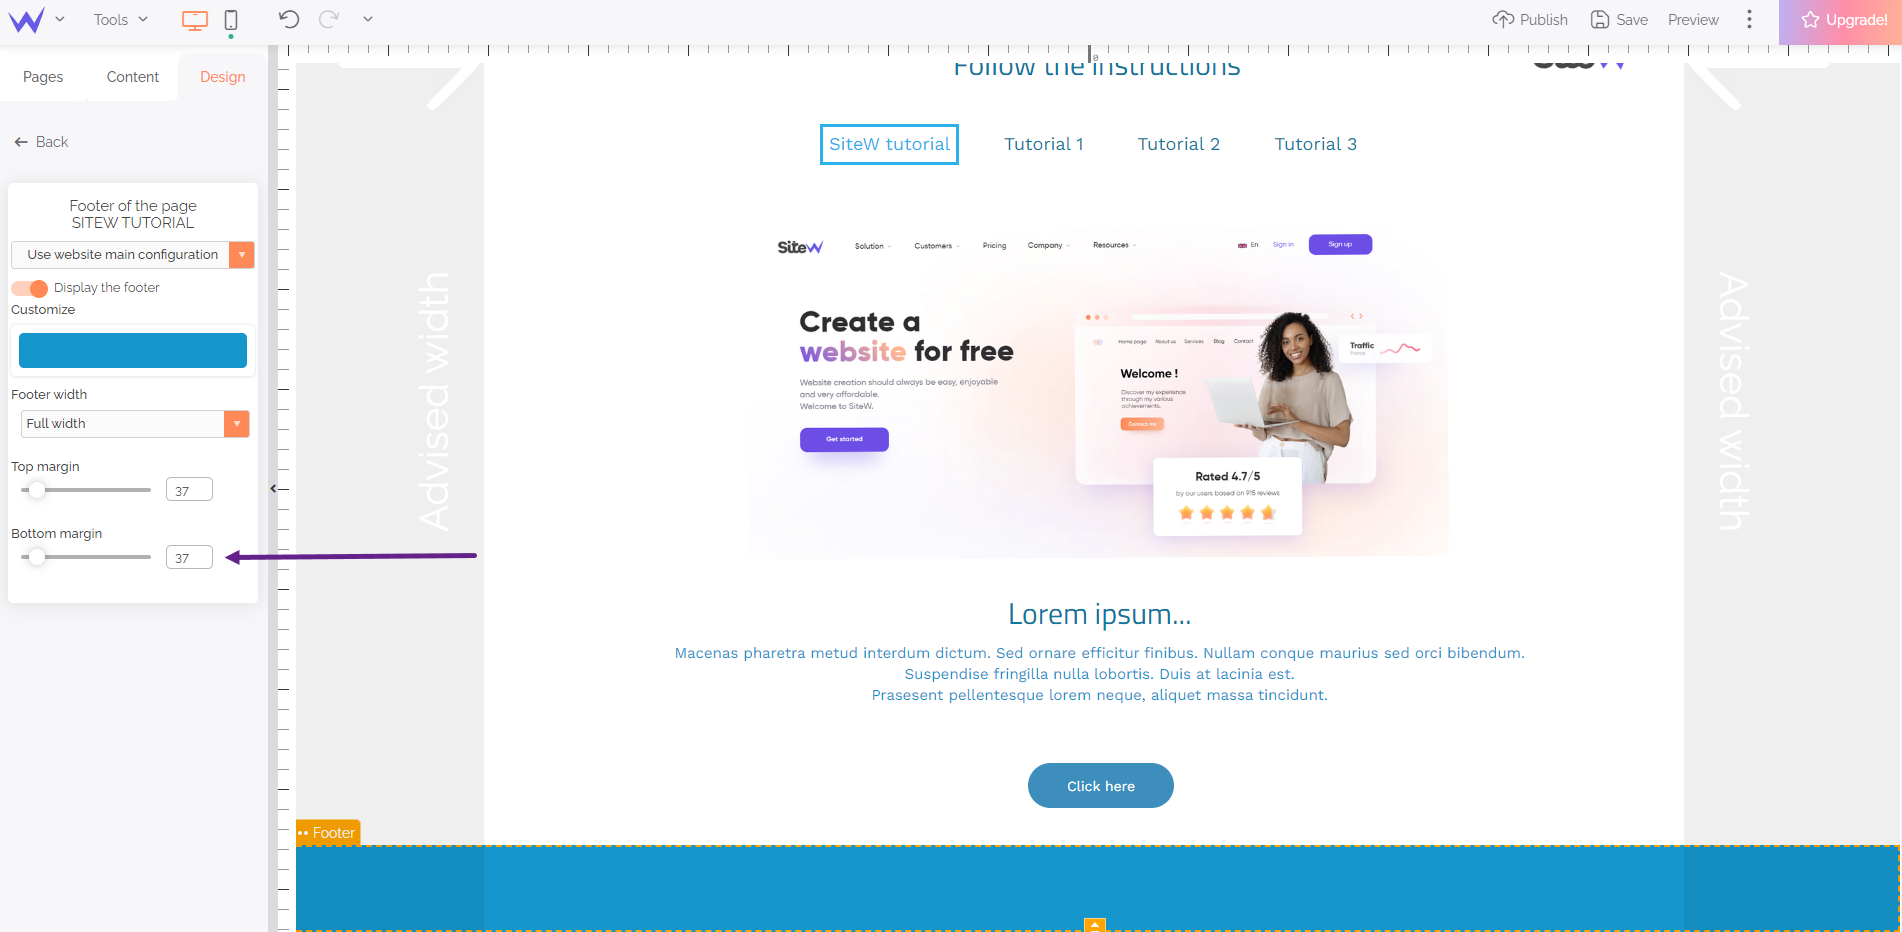
This margin enables you to add spacing between the bottom of the lowest block of the footer and the bottom of the footer. This margin is useful, only if you have configured a background (image / colour / gradient) because it enables the bottom of the footer not to be stuck to the bottom of the last block of the footer. This margin is called “Bottom padding”.
In conclusion, with the SiteW functionality specially for the footer, you can configure the footer of each of your pages with just a few clicks. It will automatically be compatible with your content, without any manual action from you in order that you save time and be efficient for your website creation!

